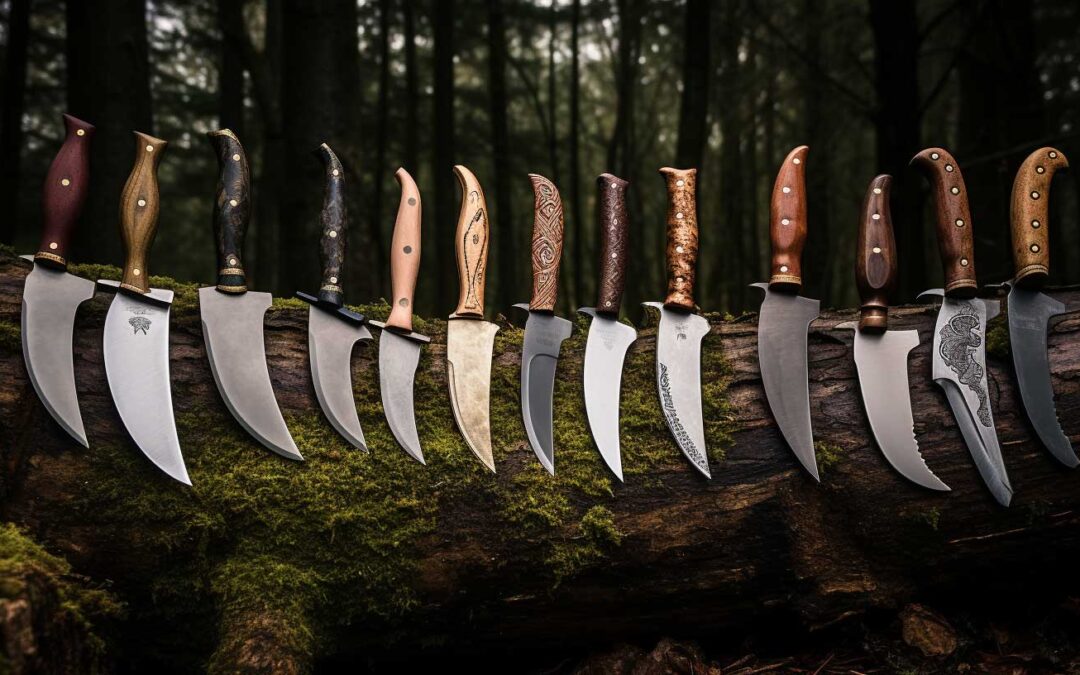
A Comprehensive Guide to Choosing Your Ultimate Camping Knife
The Importance of a Good Camping Knife
Camping can be one of the most exhilarating and fulfilling experiences that nature has to offer. Being outdoors, enjoying the fresh air, and taking in the sights and sounds of nature can be an unforgettable experience. But in order to have a successful camping trip, it’s important to have the right tools at your disposal – and one of those tools is a good camping knife.
A quality camping knife is an essential tool for any outdoor enthusiast. It can help you prepare food, build shelter, start a fire, or even act as a self-defense weapon in case of emergency.
Having a reliable knife with you at all times during your camping trip can make all the difference between an enjoyable experience and a stressful one. When it comes to choosing the right camping knife for your needs, there are many factors to consider.
The size and weight of the knife, blade type and shape, handle material, and additional features such as serration or full tang construction are all important factors to consider when making your selection. A good camping knife will be durable enough to withstand heavy use while still being comfortable enough for extended use over long periods of time.
In short, investing in a quality camping knife is not just smart – it’s essential for anyone looking to enjoy their time in nature without worrying about being unprepared. In this article we’ll take you through everything you need to know about picking out the perfect camp knife so that you’re ready when adventure calls!


Types of Camping Knives
Fixed Blade Knives: Why they are great for heavy-duty tasks
Fixed blade knives are a popular choice among campers because they offer the strength and durability needed for heavy-duty tasks such as chopping wood, preparing food, and building shelter. Fixed blades are also great for hunting or fishing trips where you need to process meat. One of the key advantages of fixed blade knives is their simplicity.
They have no moving parts, making them less likely to break or malfunction when subjected to heavy use. This also means that they require minimal maintenance, making them ideal for long camping trips where you may not have access to sharpening tools.
Another advantage of fixed blade knives is that they offer better control and precision than folding or multi-tool knives. The full tang construction provides a solid grip and allows for more force to be applied when chopping or cutting through tough materials.
Folding Knives: Their convenience and portability
Folding knives are a popular choice among campers who value convenience and portability. Unlike fixed blade knives, folding knives can be easily stored in your pocket or backpack without taking up much space. One of the key advantages of folding knives is their versatility.
They come in a variety of shapes and sizes, so you can choose one that’s right for your specific needs. Some folding knives even include additional features like bottle openers or screwdrivers, making them useful for non-camping activities as well.
Folding knives is that they tend to be more affordable than fixed blade knives. While there are certainly high-end folding knives available on the market, many models are priced at reasonable levels while still offering reliable performance.
Multi-tool Knives: Their versatility and usefulness in emergency situations
Multi-tool knives combine several different tools into one compact package, making them an ideal choice for campers who want to be prepared for any situation. They typically include a variety of blades, pliers, screwdrivers, and other useful tools.
One of the key advantages of multi-tool knives is their versatility. They can be used for a wide range of tasks, from opening cans to repairing camping gear.
This makes them particularly useful in emergency situations where you need access to a variety of tools. Another advantage of multi-tool knives is that they are compact and lightweight.
While they may not offer the same level of performance as dedicated fixed or folding knives, they are an excellent choice for those who value portability and convenience above all else. Plus, many models include additional features like bottle openers or saws that can come in handy while camping.
| Knife | Key Features | Blade Material | Blade Length | Link |
|---|---|---|---|---|
| Morakniv Companion | Lightweight, Durable, Affordable, Comfortable grip | Sandvik 12C27 Stainless Steel | 4.1 inches | Amazon |
| Ka-Bar Becker BK2 | Heavy-duty, Full tang construction | 1095 Cro-Van Steel | 5.25 inches | Amazon |
| Gerber Paraframe | Folding knife, Lightweight, Easy to carry | 420HC Stainless Steel | 3.25 inches | Amazon |
| ESEE 4 | High-quality, Full tang construction, Comfortable micarta handle | 1095 Cro-Van Steel | 4.25 inches | Amazon |
| Ontario Knife Company Rat 1 | Budget-friendly, Reliable, Lightweight | 1095 Cro-Van Steel | 3.75 inches | Amazon |
| Cold Steel Recon 1 | Large, Heavy-duty, Full tang construction | AUS-8A Stainless Steel | 5.5 inches | Amazon |
| Buck 110 | Classic folding knife, Sturdy brass frame | 420HC Stainless Steel | 4 inches | Amazon |
| Victorinox Swiss Army Knife | Multi-tool, Variety of tasks | Stainless Steel | 3.5 inches | Amazon |
| Leatherman Wave | Multi-tool, Variety of tasks | Stainless Steel | 4 inches | Amazon |
Blade Materials
Stainless Steel Blades: The Benefits and Drawbacks
When choosing a camping knife, one of the most important factors to consider is the type of blade material. Stainless steel blades are a popular choice among campers because they are resistant to rust and corrosion.
This means that they can be used in wet environments without worrying about damage to the blade. Additionally, stainless steel blades require less maintenance than other types of blades, so they are a great option for those who don’t want to spend a lot of time sharpening and caring for their knife.
However, there are some drawbacks to stainless steel blades as well. They tend to be softer than other types of blades, which means that they may not hold an edge as well over time.
This can make them less effective for heavy-duty tasks like chopping wood or cutting through thick branches. Additionally, some people find that stainless steel blades lack the sharpness and precision of other materials.
High Carbon Steel Blades: Their Durability and Sharpness
High carbon steel blades are another popular choice among campers because they are incredibly durable and sharp. These knives are able to hold an edge for longer periods of time than stainless steel knives, which makes them ideal for heavy-duty tasks like chopping wood or slicing through tough materials. However, there is a downside to high carbon steel blades as well.
They require more maintenance than other types of blades because they are more prone to rust and corrosion.
These knives tend to be heavier than other types of camping knives, which can make them more difficult to carry around on long hikes.
Ceramic Blades: Their Lightweight Nature and Sharpness
Ceramic blades may not be as well-known as stainless or high carbon steel options but have become increasingly popular due to their lightweight nature and sharpness. Ceramic is a very hard material, which means that ceramic blades can stay sharp for incredibly long periods of time without requiring much maintenance at all.
Ceramic blades are incredibly lightweight, making them ideal for long hikes and backpacking trips. There are some drawbacks to ceramic blades as well.
They tend to be more brittle than other types of blades and may chip or break if not used properly. Additionally, they are not as versatile as steel blades and may not be able to handle heavy-duty tasks like chopping wood or carving through thick branches.

Blade Shapes
Drop Point Blades: Ideal for General Purpose Use
When it comes to camping knives, the drop point blade is a popular choice due to its versatility. This blade shape has a convex curve on the back of the blade that leads to a point, which is slightly lowered compared to the spine of the knife. This design makes it ideal for general purpose tasks such as slicing, chopping, and carving.
The curved edge also allows for easier skinning and gutting of game. One of the benefits of a drop point blade is that it offers a large belly area that can be used for slicing through larger objects like branches or ropes.
The tip is also strong enough for piercing tough materials without breaking or bending. Drop point blades come in various lengths, so you can choose one according to your specific needs.
Tanto Blades: Perfect for Piercing Tasks
Tanto blades are popular among campers and outdoors enthusiasts due to their sharpness and sturdiness. This Japanese-style blade has a straight edge with a triangular tip that makes it ideal for piercing tasks. The tanto’s sharp point can easily penetrate through hard materials such as wood or bone.
Tanto blades are also well-suited for self-defense situations since they have a sturdy tip capable of delivering deep puncture wounds. However, due to their shape, they might not be as versatile as other blade shapes when performing general tasks.
Clip Point Blades: Great for Precision Cutting
Clip point blades have an angled cutout on the back near the tip which reduces weight and improves control when using the knife in precision cutting tasks such as carving or whittling small objects like sticks or feathering kindling. They are also useful when making detailed cuts on leatherwork projects.
A clip point’s thin profile makes it easy to maneuver around tight spaces while the sharp tip can be used for piercing tasks. However, clip point blades may not be as strong as other blade shapes and can break or bend when used for heavy-duty tasks.
Choosing the right blade shape depends on the specific tasks you will be performing while camping. Whether it’s general use, piercing or precision cutting, each blade shape has its own strengths and weaknesses that make them ideal for certain situations.

Handle Materials
When it comes to camping knives, the handle material is just as important as the blade itself. The handle determines how comfortable and secure your grip will be, especially when performing intricate tasks. Here are some popular handle materials to consider:
Wood Handles: Their Natural Beauty and Grip Benefits
There’s something special about a knife with a wooden handle. Not only do they look beautiful, but they also provide excellent grip and feel great in your hand.
Wood handles have natural pores that help absorb moisture, making them ideal for camping trips where you may encounter rainy or humid conditions. Some popular types of wood used for camping knife handles include walnut, oak, and maple.
One thing to keep in mind with wood handles is that they require some maintenance to keep them looking their best. You’ll want to clean them regularly with a mild soap and water solution, then dry thoroughly before oiling them up with a food-grade oil like mineral oil or beeswax.
Synthetic Handles: Their Durability and Weather Resistance
If you’re looking for a more low-maintenance option, synthetic handles might be just what you need. These handles are made from materials like rubber, nylon, or G10 – a composite material made from woven fiberglass and resin – which offer excellent durability and weather resistance.
Synthetic handles are also great for those who prefer a more textured grip on their knives. Many synthetic handles feature raised patterns or texturing which provide extra traction even when your hands are wet or gloved up.
Versatility of G10 Handles
G10 is an increasingly popular choice among camping knife enthusiasts due to its versatility as a handle material. Not only is it extremely durable (it can withstand high temperatures without melting or degrading), but it’s also lightweight and easy to shape into complex designs. This makes it a great option for those who want a knife with a unique look and feel.
G10 handles are also highly resistant to moisture, making them ideal for use in wet conditions. They’re easy to clean and maintain, too – simply wipe them down with a damp cloth and you’re good to go.

Additional Features to Consider
Serrated vs Straight Edge Blades: The Great Debate
One of the biggest debates in the camping knife world is whether to choose a serrated or straight edge blade. Serrated blades have teeth along the edge that make it easier to saw through tougher materials like rope or wood, but they can be harder to sharpen and may not offer as clean of a cut.
On the other hand, straight edge blades are sharper and better for precision cutting, but may struggle with tougher materials. Ultimately, it comes down to personal preference and intended use.
If you plan on doing a lot of sawing or cutting through tough materials, a serrated blade might be your best bet. If precision cutting is more your thing, go with a straight edge.
Half Serrated Blades: The Best of Both Worlds?
For those who can’t decide between serrated or straight edge blades, half serrated blades offer a nice compromise. These knives have part of the blade serrated and part straight edge, allowing for both sawing and precision cutting capabilities in one knife. However, keep in mind that these knives can be harder to sharpen due to their dual edges.
Full Tang Construction: Why It Matters
When it comes to camping knives, full tang construction is crucial for durability and strength. Full tang means that the blade extends all the way through the handle, creating one solid piece of metal from tip to end cap. This type of construction provides maximum stability and control when using the knife for heavy-duty tasks like chopping wood or preparing food.
Knives without full tang construction can break more easily if put under too much stress. When selecting a camping knife, it’s important to consider these additional features beyond just blade type and handle material.
Serrated vs straight edge blades? Half serrated?
Full tang? These factors can make a big difference in how the knife performs and lasts over time.
Take the time to think about what tasks you’ll be using your knife for and choose accordingly. A well-chosen camping knife can be your most valuable tool in the great outdoors.

Conclusion
After considering all the features and factors for choosing a camping knife, it is important to remember that the decision ultimately comes down to personal preference and intended use.
First, consider the type of blade that would be best suited for your needs – fixed, folding or multi-tool.
Then decide on the blade material – whether you prefer stainless steel, high carbon steel or ceramic blades. Next, think about the blade shape that would be most useful for your outdoor activities – drop point, tanto or clip point.
Consider handle materials such as wood or synthetic options like G10 handles which provide excellent durability and weather resistance. Think about any additional features such as serrated vs straight edge blades and half serrated options which could enhance performance during outdoor tasks.
Whatever knife you choose to bring on your next camping trip or outdoor adventure, it is sure to be an essential tool that will make a significant difference in how you experience nature. Happy exploring!
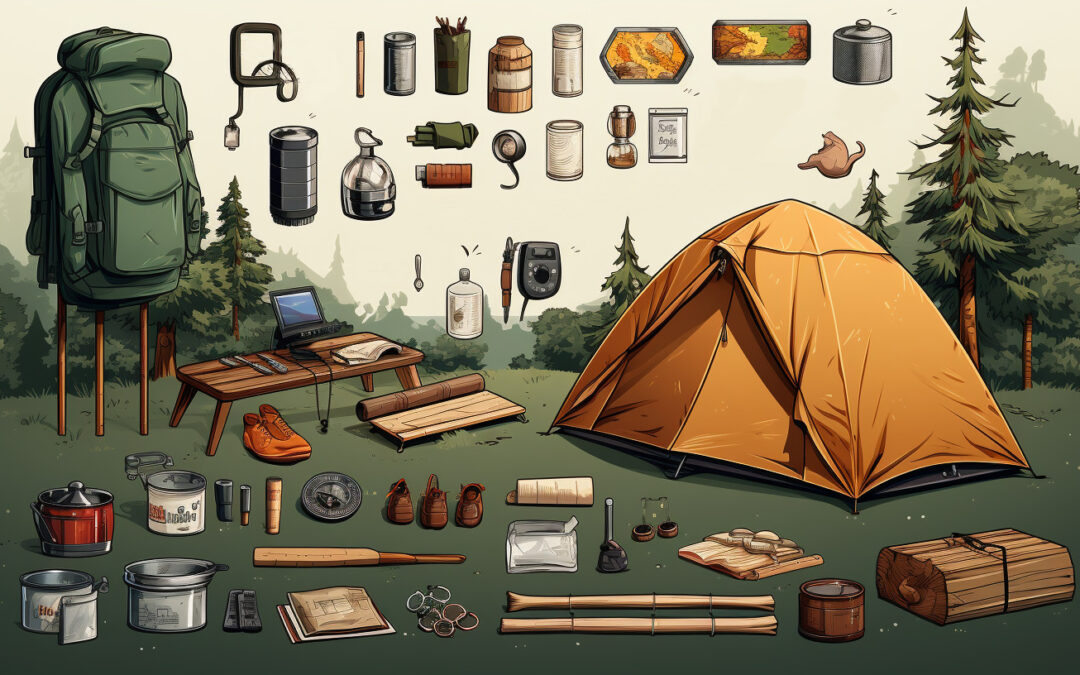
Camping Gear Checklist Download
| First-Time Camping Tips | ||
|---|---|---|
| Shelter & Sleep System | ||
| Camp Kitchen & Food | ||
| Camp Cooking Extras | ||
| Serving and Tableware | ||
| Cleanup | ||
| Campfire Tools | ||
| Extras and Camping Activities | ||
Campsite Planning
Make sure to plan your campsite location and any additional requirements beforehand to ensure a smooth camping experience.