Quick and Easy Camping Meal Ideas: Perfect for Families!
Quick and Easy Camping Meal Ideas for Families
When it comes to camping with the whole family, meal planning can often be daunting. But fear not, dear campers, for I am here to rescue you from culinary monotony and elevate your camping meals to a whole new level of deliciousness.
Brace yourselves for my quick and easy camping meal ideas for families that will leave you begging for seconds! First and foremost, let’s embrace the power of one-pot wonders.
| Recipe | Ingredients | Instructions |
|---|---|---|
| Campfire Stew | 1 lb stewing beef, 2 carrots, 2 potatoes, 1 onion, 2 cloves garlic, 4 cups beef broth, Salt, and pepper to taste | Combine all ingredients in a large pot. Place the pot over the campfire and bring to a boil. Reduce heat and let simmer for 2 hours, or until the beef is tender. Season with salt and pepper before serving. |
| Grilled Veggie Skewers | 2 bell peppers, 1 zucchini, 1 red onion, 1 cup cherry tomatoes, 1/4 cup olive oil, Salt, and pepper to taste | Thread the vegetables onto skewers. Brush with olive oil and season with salt and pepper. Grill over the campfire until the vegetables are tender and slightly charred. |
| Campfire Pancakes | 2 cups pancake mix, 1 1/2 cups water, 1/2 cup blueberries, Maple syrup for serving | Combine the pancake mix and water in a bowl. Stir in the blueberries. Pour 1/4 cup of batter onto a hot griddle over the campfire. Cook until bubbles form on the surface, then flip and cook until golden brown. Serve with maple syrup. |
| S’mores Dip | 1 cup chocolate chips, 2 cups mini marshmallows, Graham crackers for serving | Place the chocolate chips in a cast iron skillet. Top with the mini marshmallows. Place the skillet over the campfire and cook until the marshmallows are golden brown and the chocolate is melted. Serve with graham crackers for dipping. |
| Campfire Chili | 1 lb ground beef, 1 onion, 2 cloves garlic, 1 can (15 oz) kidney beans, 1 can (15 oz) diced tomatoes, 2 tbsp chili powder, Salt, and pepper to taste | Cook the ground beef, onion, and garlic in a pot over the campfire until the beef is browned. Add the kidney beans, diced tomatoes, and chili powder. Bring to a boil, then reduce heat and let simmer for 20 minutes. Season with salt and pepper before serving. |
These marvels of simplicity minimize the number of dishes to wash (we all hate dish duty, am I right?), and they also allow for culinary creativity that knows no bounds. Picture this: a sizzling pot over the campfire filled with hearty ingredients like tender chunks of chicken, colorful vegetables, and aromatic herbs.
The symphony of flavors merges together as nature’s embrace surrounds you. This is the magic of one-pot meals.
But let us not forget about grilling – the epitome of outdoor cooking prowess! There is something incredibly satisfying about tending to a crackling fire while carefully placing marinated meats or grilled vegetables on a hot grill grate.
The aroma wafting through the air is enough to make any camper weak in the knees with anticipation. From juicy steaks seared to perfection to charred corn on the cob bursting with sweetness, grilling elevates any camping menu from ordinary to extraordinary.
Dear families embarking on an outdoor adventure, do not succumb to mundane camping meal ideas! Embrace one-pot wonders and unleash your culinary creativity over open flames.
Grill your way into gastronomic bliss and create memories around delicious meals that rival those enjoyed in fancy restaurants. With these quick and easy camping meal ideas at your disposal, there’s no excuse for settling for anything less than extraordinary when it comes to nourishing yourself while basking in nature’s glory.
Healthy Camping Meal Ideas for Active Outdoor Enthusiasts
Ah, the outdoor enthusiast! The embodiment of vitality and vigor, seeking adrenaline-fueled escapades amidst nature’s embrace.
For these adventurers, sustaining their bodies with wholesome and nutritious meals that fuel their daring feats is imperative. No wimpy protein bars or dehydrated meals shall suffice; we must indulge the active outdoorsman with healthy camping ideas matching their insatiable appetite for adventure!
Firstly, let us address the importance of lean proteins. When traipsing through rugged terrain or conquering treacherous peaks, your muscles deserve sufficient strength-building sustenance.
Say goodbye to dubious mystery meats and processed sausages! Instead, opt for marinated grilled chicken breast seasoned with herbs and spices that invoke the primal essence of outdoor cooking.
As it meets the searing heat of a well-built fire, the sizzling sound will awaken your taste buds in anticipation of a hearty feast. Next on our quest for nourishment is exploring the realm of vibrant vegetables.
It is all too common to find campers resorting to canned beans and wilted salads as their feeble attempts at incorporating greens into their outdoor menu. Let us strive for more culinary creativity here!
Picture this: succulent grilled vegetables kissed by flames, from zucchini and bell peppers to eggplant and juicy cherry tomatoes bursting with flavor. Roast them over glowing embers until they are charred in all the right places—nature’s caramelization technique—and serve them alongside your protein choice for a rainbow-colored medley that will make any self-proclaimed foodie swoon.
To complement these divine dishes fit for champions of outdoor adventure, let us not forget hydration. Quenching one’s thirst can be elevated beyond mere water bottles by infusing it with Nature’s bounty itself – slices of fresh citrus fruits or sprigs of fragrant herbs like mint or rosemary can transform a mundane drink into a revitalizing elixir, providing a burst of refreshment during your thrilling expeditions.
My fellow outdoor enthusiasts, the time has come to break free from the shackles of mundane camping meal ideas and embrace a healthier culinary path. Indulge in lean proteins grilled to perfection and vibrant vegetables that celebrate the beauty of nature’s bounty.
Let us elevate our outdoor adventures through daring feats and the nourishment we provide our bodies. So, fire up those grills, unleash your culinary prowess, and savor every bite as you embark on unforgettable journeys amidst nature’s embrace.

Vegetarian Camping Meal Ideas for Nature-loving Foodies
Regarding camping meal ideas, there are many possibilities for those who prefer to embrace a vegetarian lifestyle. For all nature-loving foodies out there, the culinary creativity that can be unleashed while cooking outdoors is truly remarkable.
So, let’s delve into some mouthwatering vegetarian camping meal ideas that will have you savoring the wonders of nature’s embrace. Grilled vegetable skewers are one of the most versatile and delicious vegetarian options for your camping menu.
This dish highlights the vibrant flavors of seasonal produce and showcases your fire-building techniques. To create these delectable skewers, thread various veggies onto wooden or metal skewers, such as bell peppers, zucchini, cherry tomatoes, and mushrooms.
Drizzle them with olive oil and sprinkle with your favorite herbs and spices like thyme or smoked paprika. Place them on the grill over hot coals and cook until tender yet slightly charred.
The result is a medley of perfectly grilled vegetables that will make any outdoor adventure feel like a five-star dining experience. Another fantastic option for vegetarian campers is to indulge in one-pot wonders.
One-pot meals are convenient for camping meal planning and offer an explosion of flavors in a single dish. Consider preparing a hearty vegetable curry using seasonal vegetables like sweet potatoes, cauliflower, peas, and aromatic spices such as cumin, coriander, turmeric, and ginger.
Simply sauté onions and garlic in a large pot over your campfire or camping stove until they become translucent. Then add your chopped vegetables and spices and cook until they are tender.
Add coconut milk or vegetable broth to create a luscious sauce that harmonizes all the flavors. Serve this comforting curry over steamed rice or enjoy it with some freshly baked naan bread for an unforgettable camping dining experience.
Vegetarian camping meal ideas can truly elevate your outdoor culinary adventure. From the smoky flavors of grilled vegetable skewers to the comforting warmth of a one-pot vegetable curry, these dishes showcase the incredible potential that vegetarian cooking holds even in the midst of nature’s embrace.
So, next time you embark on a camping trip, don’t let your vegetarian lifestyle limit your gastronomic delight. Embrace the abundance of fresh produce and get creative with your campfire cooking to create meals that will leave you and your fellow campers in awe.
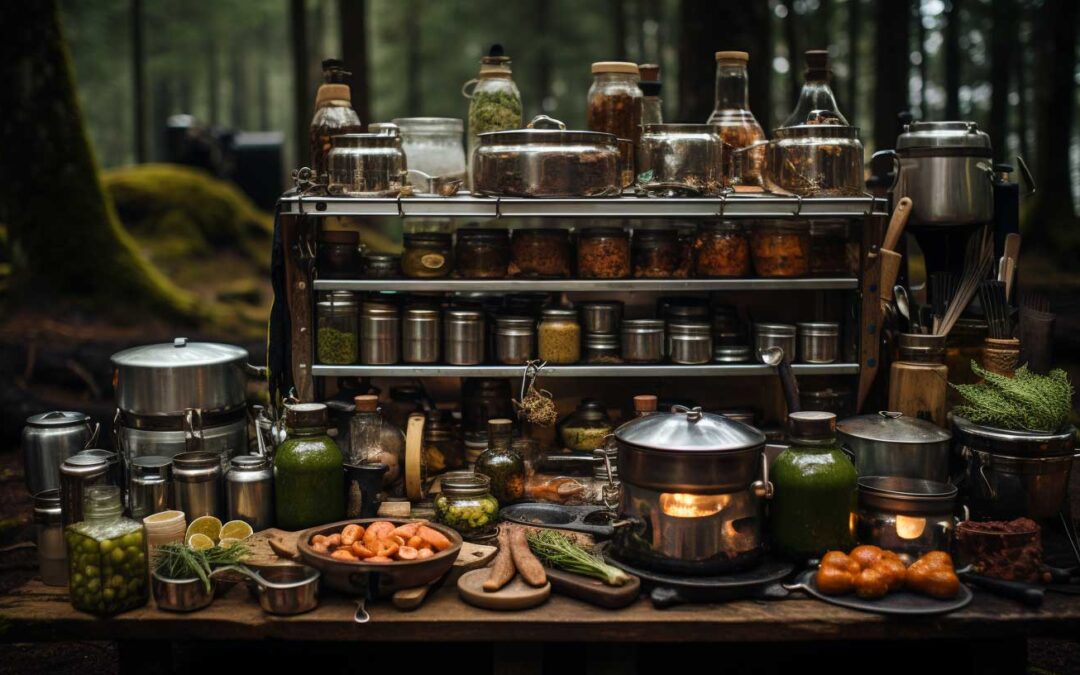
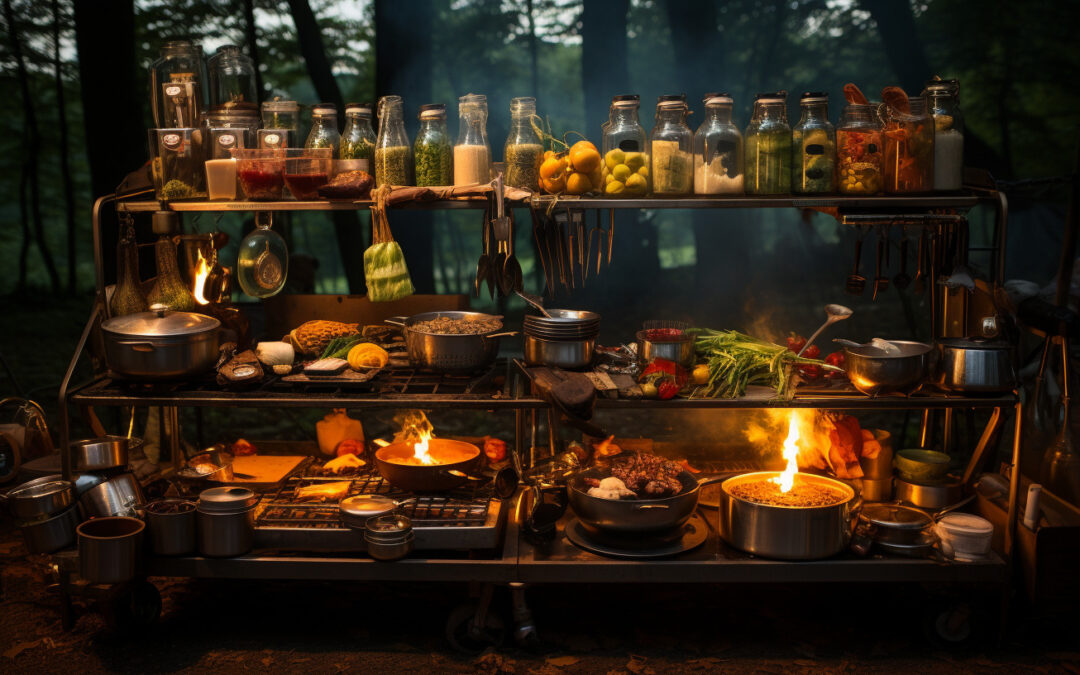
Campfire Cooking: Delicious Meal Ideas for Outdoor Adventures
Campfire cooking is where the magic truly happens when it comes to outdoor adventures and cooking over an open fire. There’s just something rustic and enchanting about gathering around a crackling fire, relishing in nature’s embrace while preparing delicious meals that will fuel your outdoor excursions. With a touch of culinary creativity, you can turn your camping meal ideas into sensational dishes that will leave your taste buds tingling with delight.
One-Pot Wonders are an absolute must for campfire cooking. They simplify the meal planning process and minimize the cleanup effort, allowing you to spend more time enjoying the great outdoors rather than washing dishes.
Imagine simmering a hearty stew filled with tender chunks of meat, vibrant vegetables, and aromatic herbs in a single pot suspended above the dancing flames. The tantalizing aromas wafting through the air as you stir the pot with anticipation make for an unforgettable experience.
One-pot wonders offer convenience without compromising on flavor; they are versatile and adaptable to suit various dietary preferences or restrictions. Grilling is another fantastic option for campfire cooking that brings out bold flavors in your meals while infusing them with a satisfying smoky essence.
Picture marinated skewers threaded with succulent pieces of meat or vegetables slowly charring over glowing embers—each sizzle and hiss creating anticipation for what awaits on your menu. From juicy steaks to perfectly charred corn on the cob, grilling allows you to indulge in delectable dishes that simultaneously showcase simplicity and finesse.
Campfire cooking is all about embracing nature’s elements while utilizing fire-building techniques to create mouthwatering meals that elevate any outdoor adventure. Whether you’re searing fresh-caught fish on a cast-iron skillet or roasting marshmallows to perfection for s’mores under a starlit sky, cooking outdoors is deeply satisfying amidst breathtaking landscapes.
So pack up your cooking essentials, gather around the fire, and let your culinary imagination run wild. Campfire cooking is an art that can turn a simple camping trip into a culinary adventure for all to savor.
One-Pot Camping Meals: Simplify Your Outdoor Meal Planning
When it comes to camping, simplicity is key. You don’t want to spend hours slaving away over a hot campfire, trying to concoct an elaborate feast.
No, what you need is the magic of one-pot camping meals. These culinary marvels not only simplify your outdoor meal planning but also allow you to immerse yourself in the beauty of nature’s embrace fully.
One-pot wonders are a godsend for any outdoor adventurer. They eliminate the need for excessive cooking equipment and make clean-up a breeze.
Picture this: you gather around a crackling campfire with your loved ones, surrounded by the scent of pine and freshly brewed coffee. As the sun sets on the horizon, you effortlessly whip up a hearty stew in a single pot suspended over the flames.
The aroma wafts through the air, tantalizing everyone’s taste buds and creating an atmosphere of contentment. But here’s where I’m about to drop some unpopular opinions: grilling enthusiasts might argue that one-pot camping meals lack that smoky char that can only be achieved through open-flame grilling.
While I respect their dedication to charred perfection, let me tell you something – cooking outdoors should be about more than just charring meat or impressing your friends with fire-building techniques. It should be about embracing simplicity and making memories in nature’s embrace.
So ditch those complicated grilling setups and embrace the ease and versatility of one-pot camping meals. From hearty stews simmering over open flames to fragrant curries bubbling away on portable stoves, these meals offer culinary creativity amidst rugged surroundings.
With just one pot and some carefully selected ingredients, you can create a feast fit for champions without breaking a sweat or sacrificing precious time adventuring in the great outdoors. Regarding camping meal ideas, don’t get caught up in overly complicated menus or fancy cooking techniques that distract from your outdoor experience.
Embrace the simplicity and convenience of one-pot camping meals. These culinary wonders allow you to focus on what truly matters – connecting with nature, spending quality time with loved ones, and creating unforgettable memories under the stars.
So, let go of those grill-centric notions and explore the world of one-pot wonders. Your taste buds and fellow campers will thank you for it.
Conclusion
In the realm of outdoor adventure, there are few things as satisfying as cooking outdoors. The crackling flames, the tantalizing scents wafting through the air, and the sheer joy of creating a delicious meal amidst nature’s embrace is an experience like no other.
Throughout this article, we have explored various camping meal ideas that cater to different tastes and dietary preferences, all aimed at enriching your culinary experience in the great outdoors. From one-pot wonders to grilling delights, we have delved into the world of campfire cooking and discovered a plethora of delectable dishes that can be easily prepared with minimal equipment.
We have embraced culinary creativity by exploring vegetarian options that tantalize even the most committed meat-lovers taste buds. By sharing healthy camping meal ideas, we have demonstrated how you can fuel your body for those exhilarating outdoor activities while still savoring mouthwatering flavors.
The concept of menu planning has been elevated to new heights as we explored quick and easy camping meal ideas specifically tailored for families. Gone are the days of settling for bland canned beans or dry sandwiches – now you can indulge in wholesome meals that are both effortless to prepare and delightful to devour.
And let’s not forget about one-pot meals, those time-saving miracles that take your camping cuisine from ordinary to extraordinary. With some fire-building techniques and a dash of creativity, you can transform a simple pot into a vessel brimming with unforgettable flavors.
Exploring Camping Meal Ideas has been an exhilarating journey into the world of outdoor culinary delights. From healthy options to vegetarian wonders and from quick-and-easy family meals to one-pot creations that redefine convenience, there is something for everyone within this realm of gastronomic pleasure.
So pack your bags, gather around the campfire with loved ones or embark on solo adventures in nature’s embrace – armed with these newfound recipes and insights – and let the joy of cooking outdoors elevate your camping experience to new heights. Bon appétit!
Camping Gear Checklist Download
| First-Time Camping Tips | ||
|---|---|---|
| Shelter & Sleep System | ||
| Camp Kitchen & Food | ||
| Camp Cooking Extras | ||
| Serving and Tableware | ||
| Cleanup | ||
| Campfire Tools | ||
| Extras and Camping Activities | ||
Campsite Planning
Make sure to plan your campsite location and any additional requirements beforehand to ensure a smooth camping experience.